Recently, I have been asked by Farnell if I were interested in taking part in their free product road test program.
As I like tinkering with electronics stuff, I said yes and chose the
STM32F4-Discovery board as an item to test.
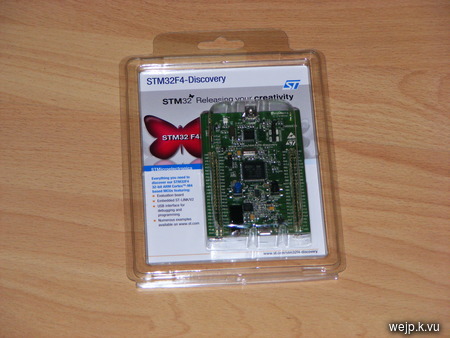
The STM32F4-Discovery board is little development/evaluation board from ST to promote their STM32F4 micro controller series. The STM32F407 on the Discovery board consists of a 32 bit Corex-M4F ARM processor (which can run at up to 168 MHz), 192 kB of RAM (112+16+64 kB), 1 MB of flash memory and lots of peripherals (timers, DMA controllers, DACs, ADCs, two USB OTG ports, ...) and of course lots of general purpose I/O pins.

The STM32F4-Discovery board is little development/evaluation board from ST to promote their STM32F4 micro controller series. The STM32F407 on the Discovery board consists of a 32 bit Corex-M4F ARM processor (which can run at up to 168 MHz), 192 kB of RAM (112+16+64 kB), 1 MB of flash memory and lots of peripherals (timers, DMA controllers, DACs, ADCs, two USB OTG ports, ...) and of course lots of general purpose I/O pins.
Basically the micro controller is similar to 8 bit micro controllers like AVRs, but it is much faster and has more
of everything those 8 bit controllers come with: More RAM, more GPIOs, more timers, ...
Of course that also means that such a micro controller is more complex than the usual 8 bit controller.
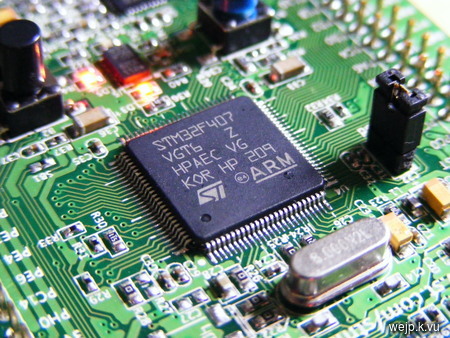
The STM32F4 is available in different packages (LQFP, BGA), but none of them are really hobbyist-friendly, which is simply due to the large amount of I/O pins. If it was available in DIL package, it had to be huge. Anyone remember those huge 64 pin DIL 68000 processors? ;)
Fortunately, when using the STM32F4 on a board like the STM32F4-Discovery, one does not have to bother about the controller's package. Most IO pins are nicely routed to easily accessible pin headers.
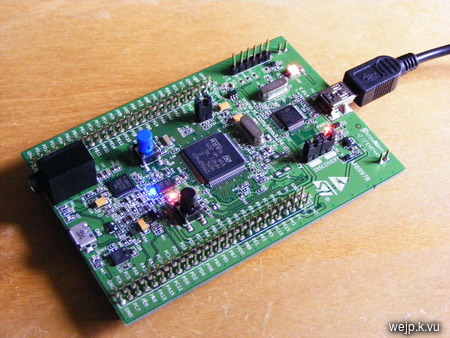
Besides the controller, the STM32F4-Discovery includes several other interesting components:
- A LIS302DL accelerometer
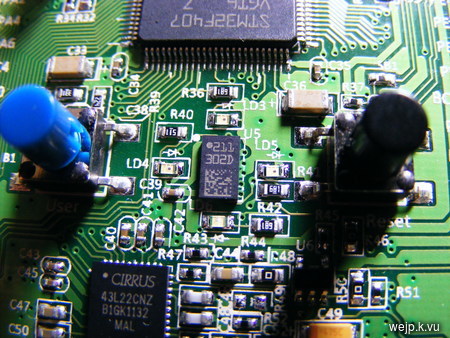
- a digital microphone
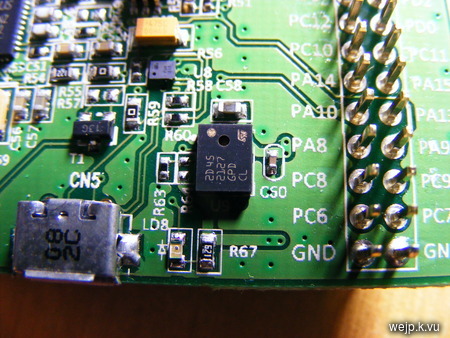
- an external DAC (with a 3.5" audio output connector)
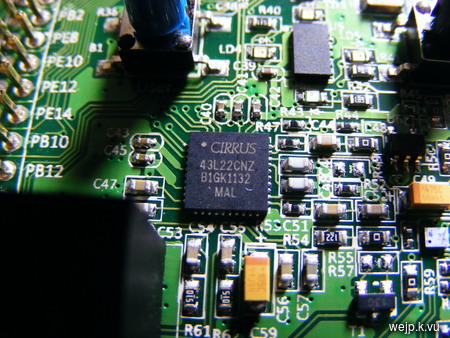
- four user controllable LEDs and two buttons (one user button, one for reset).
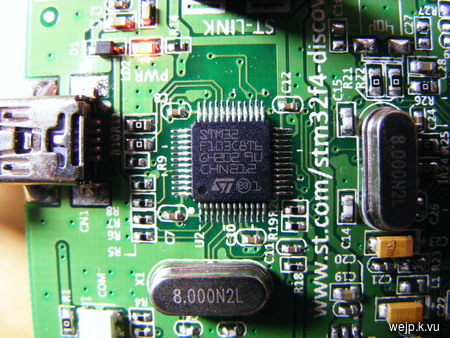
The board also includes a second ARM micro controller (STM32F103), that is being used for programming the main controller through USB.
The STM32F4-Discovery comes with an example application pre-installed on the controller's flash memory, which is basically a demonstration of the accelerometer. Depending on which direction you tilt the board, one of the four LEDs lights up. When connecting the board through the second USB connector (a micro USB port) to a PC, the software on the controller works as a human interface devices (HID) and is being recognized as a mouse by the computer. The mouse pointer is controlled through the accelerometer. That's basically what the pre-installed example application does.
Playing around with the example application is nice, but of course I wanted to run my own software on the board. So the first step to get started with development (besides reading the microcontroller's datasheet and reference manual), was to install a toolchain for compiling programs targeted at the STM32F4.
As you probably know, I don't use Windows, so I could not (easily) use the development software packages suggested by ST. Also, the license terms of at least some of the files supplied by ST are somewhat unclear (Am I allowed to redistribute the ST STM32F4 header files with my project?) and some of the license terms (especially that of the Atollic linker script comes to mind) explicitly state that I cannot redistribute it with my project (although I am allowed to use and modify it for my own use).
To avoid any of those issues, I decided to use open source software components only. A popular toolchain choice for for the STM32 controller family seems to be the Summon ARM toolchain, which is a shell script that builds a bare metal arm-none-eabi toolchain. It uses the Linaro GCC by default. There is a variant of the Summon ARM toolchain which is supposed to support the Cortex-M4F, which I intended to use, as it includes support for the Cortex-M4's floating point unit, which the otherwise compatible Cortex-M3 does not have. Unfortunately the Linaro GCC fails to build on Arch Linux with Arch's GCC 4.7 and the alternate FSF GCC 4.5 does not support the Cortex-M4F. As I did not want to bother with how to fix the compilation issues of the Linaro compiler, I decided to try another toolchain. I chose the ARM embedded toolchain, which currently uses GCC 4.6 (and as such supports the Cortex-M4F) and the newlib embedded C library. It is also available in pre-compiled form. In addition to that I decided to use the libopencm3 library, which is a support library for several Cortex-M3 and M4 micro controllers. It is basically a nice replacement for the ST supplied header files etc. It has macros for most of the STM32F4's registers and many convenience functions for accessing the hardware. To actually write compiled programs to the STM32F4's flash memory, I use the open source stlink utility.
So, now that I had everything setup to build programs for the board, I had to decide what my first real program should be. At this year's Revision party, there was this nice wild demo for the STM32F4-Discovery board called Peridiummmm, which uses a simple resistor-based DAC on some of the controller's GPIOs to output VGA video to a standard PC monitor. This inspired me to also try outputting VGA video the same way. Actually, I thought about doing some bit-banging VGA on a micro controller before, but I never did, so this was a good reminder and starting point for actually trying to do that.
Building a suitable DAC is really simple. It basically consists of several resistors wired up as potential dividers. I use the same wiring with (almost) the same resistor values for my DAC, as the one used for the Peridiummmm demo, so it is compatible with it.
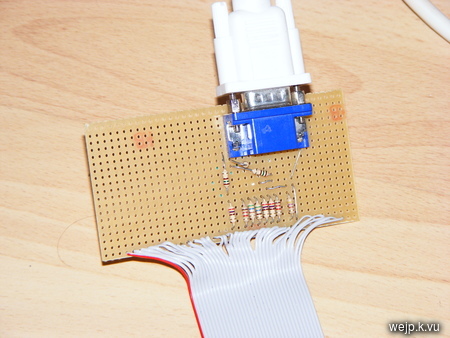
The VGA DAC is connected to eight I/O pins of the controller, so it can display up to 256 different colors. The actual colors are determined by the resistor values of the DAC. Of those 8 bits, three bits are used for red, another three for green and the remaining two for blue. Despite the DAC, everything else is done in software with the help of two timers. The actual pixel data is transfered using DMA. I have ported the VGA stuff of that demo over to use libopencm3, so I could make use of it in my own software. This turned out to be somewhat more work than just replacing some function names, because libopencm3 is still work in progress and does not yet have macros/functions for all of the timers (up to timer 8 currently). The demo uses timer 9 for generating the VGA sync signal, so I had a problem there. Timer 9 is one of the few STM32F4 timers that can run at up to 168 MHz. Most other timers run at up to 84 MHz, which luckily is enough for this kind of signal. As I did not want to access the registers by their raw addresses and I also did not yet want to modify libopencm3 itself, I decided to use another timer (timer 3) instead of timer 9. The VGA timing is not 100 % perfect yet, but it already works good enough, so I could start writing a program that makes use of it. The program I wrote, is a very minimal version of Pong. It uses the board's accelerometer to control the player's paddle.
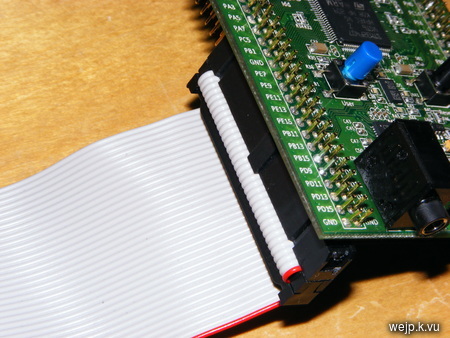
For connecting the simple VGA DAC to the board, I have used an old floppy cable.
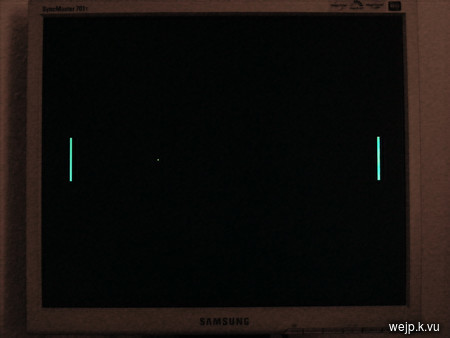
This is what the game graphics look like:
That's what I have done with the STM32F4-Discovery board so far. I have only touched the surface of developing for it, but it looks like a nice platform. The STM32F4 is a very powerful micro controller. This is especially true, if you have previously used 8 bit microcontrollers only. Compared to those 8 bit controllers, it is much much faster and there is plenty of available memory (both RAM and flash memory). Getting started with it is somewhat more difficult and time consuming than with those 8 bit AVRs, due to its increased complexity.
On the other hand, the plattform is much more powerful and allows for applications not possible on 8 bit controllers (not that I have used its power with my little program yet). One thing I like about the STM32F4-Discovery board is its easy way of programming the controller. Many other similar boards allow the controllers to be programmed through JTAG only, which means you need a JTAG interface. With this board, all you need is a standard USB cable. With the GDB debugger you can even debug programs running on the controller through the USB interface, which is pretty neat.
Overall, the STM32F4-Discovery is a pretty nice platform to get started with embedded ARM development. Previously, I have developed for various ARM-based devices, but unlike this board, all of them were running Linux on them. Developing for those devices is pretty similar to developing for a PC, while developing for a device without any operating system and with a much more limited amount of memory, really is a different experience.
If you are interested in developing for this board, you can check out the source of my little Pong game. It is pretty much a quick hack, but it might be of some use for some of you in one way or another. Also, I recommend having a look at the Peridiummmm demo mentioned above.
vgapong.tar.gz (14 kB, GPLv2)
md5sum: 62c6051b927dc018888dd57b4e6777a0

The STM32F4 is available in different packages (LQFP, BGA), but none of them are really hobbyist-friendly, which is simply due to the large amount of I/O pins. If it was available in DIL package, it had to be huge. Anyone remember those huge 64 pin DIL 68000 processors? ;)
Fortunately, when using the STM32F4 on a board like the STM32F4-Discovery, one does not have to bother about the controller's package. Most IO pins are nicely routed to easily accessible pin headers.

Besides the controller, the STM32F4-Discovery includes several other interesting components:
- A LIS302DL accelerometer

- a digital microphone

- an external DAC (with a 3.5" audio output connector)

- four user controllable LEDs and two buttons (one user button, one for reset).
The board also includes a second ARM micro controller (STM32F103), that is being used for programming the main controller through USB.

The STM32F4-Discovery comes with an example application pre-installed on the controller's flash memory, which is basically a demonstration of the accelerometer. Depending on which direction you tilt the board, one of the four LEDs lights up. When connecting the board through the second USB connector (a micro USB port) to a PC, the software on the controller works as a human interface devices (HID) and is being recognized as a mouse by the computer. The mouse pointer is controlled through the accelerometer. That's basically what the pre-installed example application does.
Playing around with the example application is nice, but of course I wanted to run my own software on the board. So the first step to get started with development (besides reading the microcontroller's datasheet and reference manual), was to install a toolchain for compiling programs targeted at the STM32F4.
As you probably know, I don't use Windows, so I could not (easily) use the development software packages suggested by ST. Also, the license terms of at least some of the files supplied by ST are somewhat unclear (Am I allowed to redistribute the ST STM32F4 header files with my project?) and some of the license terms (especially that of the Atollic linker script comes to mind) explicitly state that I cannot redistribute it with my project (although I am allowed to use and modify it for my own use).
To avoid any of those issues, I decided to use open source software components only. A popular toolchain choice for for the STM32 controller family seems to be the Summon ARM toolchain, which is a shell script that builds a bare metal arm-none-eabi toolchain. It uses the Linaro GCC by default. There is a variant of the Summon ARM toolchain which is supposed to support the Cortex-M4F, which I intended to use, as it includes support for the Cortex-M4's floating point unit, which the otherwise compatible Cortex-M3 does not have. Unfortunately the Linaro GCC fails to build on Arch Linux with Arch's GCC 4.7 and the alternate FSF GCC 4.5 does not support the Cortex-M4F. As I did not want to bother with how to fix the compilation issues of the Linaro compiler, I decided to try another toolchain. I chose the ARM embedded toolchain, which currently uses GCC 4.6 (and as such supports the Cortex-M4F) and the newlib embedded C library. It is also available in pre-compiled form. In addition to that I decided to use the libopencm3 library, which is a support library for several Cortex-M3 and M4 micro controllers. It is basically a nice replacement for the ST supplied header files etc. It has macros for most of the STM32F4's registers and many convenience functions for accessing the hardware. To actually write compiled programs to the STM32F4's flash memory, I use the open source stlink utility.
So, now that I had everything setup to build programs for the board, I had to decide what my first real program should be. At this year's Revision party, there was this nice wild demo for the STM32F4-Discovery board called Peridiummmm, which uses a simple resistor-based DAC on some of the controller's GPIOs to output VGA video to a standard PC monitor. This inspired me to also try outputting VGA video the same way. Actually, I thought about doing some bit-banging VGA on a micro controller before, but I never did, so this was a good reminder and starting point for actually trying to do that.
Building a suitable DAC is really simple. It basically consists of several resistors wired up as potential dividers. I use the same wiring with (almost) the same resistor values for my DAC, as the one used for the Peridiummmm demo, so it is compatible with it.

The VGA DAC is connected to eight I/O pins of the controller, so it can display up to 256 different colors. The actual colors are determined by the resistor values of the DAC. Of those 8 bits, three bits are used for red, another three for green and the remaining two for blue. Despite the DAC, everything else is done in software with the help of two timers. The actual pixel data is transfered using DMA. I have ported the VGA stuff of that demo over to use libopencm3, so I could make use of it in my own software. This turned out to be somewhat more work than just replacing some function names, because libopencm3 is still work in progress and does not yet have macros/functions for all of the timers (up to timer 8 currently). The demo uses timer 9 for generating the VGA sync signal, so I had a problem there. Timer 9 is one of the few STM32F4 timers that can run at up to 168 MHz. Most other timers run at up to 84 MHz, which luckily is enough for this kind of signal. As I did not want to access the registers by their raw addresses and I also did not yet want to modify libopencm3 itself, I decided to use another timer (timer 3) instead of timer 9. The VGA timing is not 100 % perfect yet, but it already works good enough, so I could start writing a program that makes use of it. The program I wrote, is a very minimal version of Pong. It uses the board's accelerometer to control the player's paddle.
For connecting the simple VGA DAC to the board, I have used an old floppy cable.

This is what the game graphics look like:

That's what I have done with the STM32F4-Discovery board so far. I have only touched the surface of developing for it, but it looks like a nice platform. The STM32F4 is a very powerful micro controller. This is especially true, if you have previously used 8 bit microcontrollers only. Compared to those 8 bit controllers, it is much much faster and there is plenty of available memory (both RAM and flash memory). Getting started with it is somewhat more difficult and time consuming than with those 8 bit AVRs, due to its increased complexity.
On the other hand, the plattform is much more powerful and allows for applications not possible on 8 bit controllers (not that I have used its power with my little program yet). One thing I like about the STM32F4-Discovery board is its easy way of programming the controller. Many other similar boards allow the controllers to be programmed through JTAG only, which means you need a JTAG interface. With this board, all you need is a standard USB cable. With the GDB debugger you can even debug programs running on the controller through the USB interface, which is pretty neat.
Overall, the STM32F4-Discovery is a pretty nice platform to get started with embedded ARM development. Previously, I have developed for various ARM-based devices, but unlike this board, all of them were running Linux on them. Developing for those devices is pretty similar to developing for a PC, while developing for a device without any operating system and with a much more limited amount of memory, really is a different experience.
If you are interested in developing for this board, you can check out the source of my little Pong game. It is pretty much a quick hack, but it might be of some use for some of you in one way or another. Also, I recommend having a look at the Peridiummmm demo mentioned above.
vgapong.tar.gz (14 kB, GPLv2)
md5sum: 62c6051b927dc018888dd57b4e6777a0
