
I have finally come around to install Coreboot on my X220 laptop. It is an X220 with a Core i5-2520M and 16 GB of DDR3-1600 RAM.
Coreboot is an open source replacement for the BIOS/UEFI firmware of a variety of laptops and mainboards. Coreboot needs to be combined with a payload component, since Coreboot itself doesn't do a whole lot besides hardware initialization. The payload I am using here is SeaBIOS, which implements the features of a PC BIOS.
It allows you to boot most PC operating systems, including those that rely on the classic PC BIOS features. For UEFI support there is the TianoCore payload. It is also possible to use the GRUB bootloader as a payload or embed a Linux kernel as a payload (if the flash chip is large enough).
Why?
So what's the point of replacing the vendor firmware? There are several reasons why one might want to do that, including- Customizability due to the large number of payloads
- Faster boot times
- Privacy/trust concerns about the closed source vendor firmware
- The urge to tinker with/destroy stuff
How?
On most machines, Coreboot cannot be flashed from a running system, because the flash chip is often locked by the vendor firmware. To be able to flash the Coreboot firmware anyway, an external SPI flasher can be used. I've used a Raspberry Pi 3, but several other single board computers can be used if they have an SPI interface. There are also flash tools dedicated to the task. The process of flashing is described in the Coreboot wiki, so I am not going into much detail here.The recommended method of attaching your flasher to the SPI BIOS flash chip on the mainboard is through a clip that you can hook onto the chip. Pomona builds those clips. There are also cheaper chinese versions available.
Since I did not have either of those, I decided to solder wires directly to the SPI flash chip.
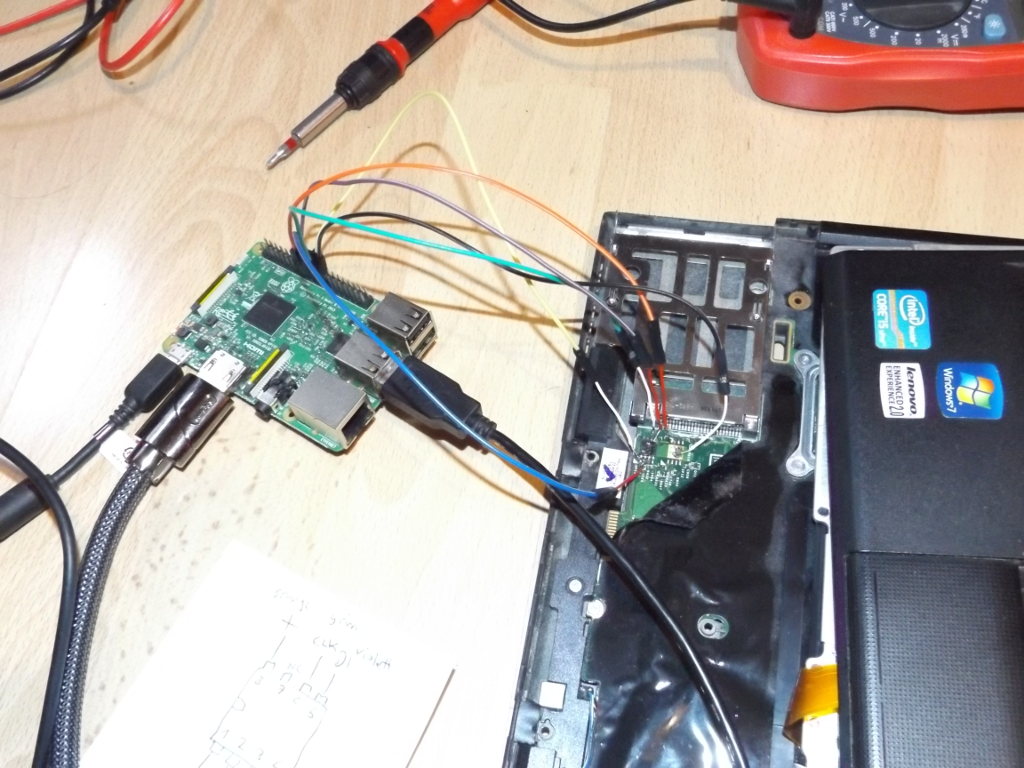
In the picture you can see the X220 with wires connected to the 8 pin SPI flash chip. It looks pretty messy, but it does the job.
As you can see in the picture, on the X220 there is an unpopulated place for a second flash chip. I was hoping the those two chips would be connected mostly in parallel, so I could solder onto the pads of the unpopulated chip, but this turned out not to be the case. Except for the power and ground connections.
I haven't been using an external power supply and instead used the 3.3 V supplied by the Raspberry Pi 3 and it worked just fine with my X220.
With all that in place, with the flashrom tool I was able to extract the original UEFI firmware from the chip and then extract the management engine, embedded controller and gigabit ethernet controller firmware blobs from the image, as explained on the Coreboot wiki. I have also extracted the VGA BIOS ROM from the original firmware.
Those components are necessary to build a working Coreboot image.
From this point on building a Coreboot image and flashing it to the X220 was pretty straigt forward, since it is explained rather well on the Wiki.
The not so obvious stuff
I have pulled Coreboot from the master branch of their git repository and the commit ID of the version I used is d0a648e18a7162f7361a13296beb0c1293acb16e (Tue Nov 29 23:20:07 2016 -0600). Things might be (slightly) different when using another version.Although there is some documentation on the whole install and a few people wrote about installing it on their machines, I couldn't easily find information about a couple of things which are rather important to me. So in case anyone is wondering about the same things, here is what I figured out.
Things I could not easily find information on include the ability to configure battery thresholds and getting suspend-to-ram to work. Both things work fine with the Vendor firmware and I consider them rather important for a laptop.
Suspend to RAM kind of works with Coreboot, but at least in Linux pm-suspend needs some quirks to work correctly. Without the quirks, the machine would go to sleep, but when waking up, the screen would not come back on. Running pm-suspend with
pm-suspend --quirk-reset-brightness --quirk-vbe-post --quirk-vbestate-restore --quirk-vbemode-restorelets the machine wake up as expected. While in suspended state, the power button LED does not flash like it does with the vendor UEFI firmware, but the moon-shaped LED on the outside is lit, so you can still tell if it is in suspend mode.
Changing the battery thresholds can hugely increase the battery's lifespan. I usually configure the battery charging such that it gets charged to only about 80 % of the battery's capacity and starts charging again only if it is discharged below around 50 %. Whether or not that is accepable for you depends on how you use the machine, but it works fine for me and helps me greatly reduce the number of charging cycles.
Configuring this with the Vendor firmware under Linux is fairly well documented, but with Coreboot it doesn't work the same way. With the Vendor firmware you would always talk to the management engine (ME) which would then tell the embedded controller (EC) to set the charging thresholds. Coreboot tries to avoid using the ME, so you have to talk to the EC directly. Fortunately Coreboot comes with a couple of utilities, one of which is ectool. There doesn't seem to be much information about the tool, but what it basically does is set configuration data in address space of the EC. To set the battery charging thresholds to 53 % and 80 % for the lower and upper thresholds, one would execute ectool twice like this:
# Battery start threshold with coreboot: 0x35 = 53 %
./ectool -w 0xb0 -z 0x35
# Stop threshold 0x50 = 80%
./ectool -w 0xb1 -z 0x50
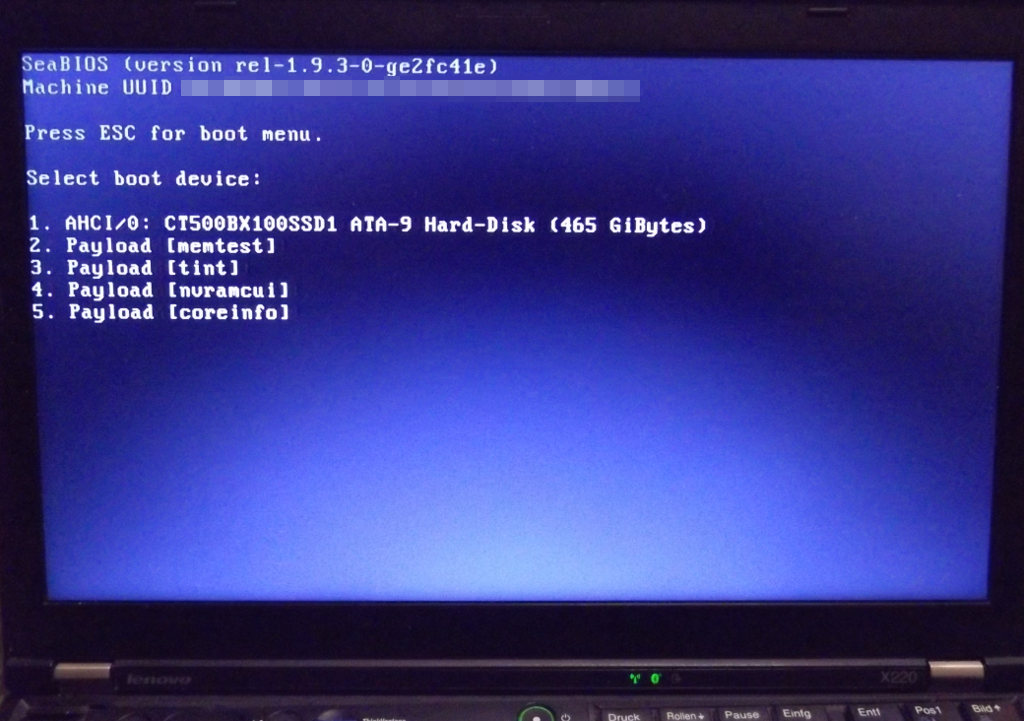
Secondary payloads and configuring system settings
Coreboot allows you to include more than one payload, but it wasn't obvious to me from the documentation how secondary Coreboot payloads are launched and if it is possible to configure things like enabling devices through Coreboot. If you want to try all this yourself, you can build Coreboot for a QEMU target. That way you don't have to risk bricking an actual machine.As it turns out, when using SeaBIOS as the primary payload, launching secondary payloads is trivial. They appear in SeaBIOS' boot menu and can be launched from there. Changing the configuration of system setting is also possible to some extent and with the help of the nvramcui payload it is possible to change those things in a similar way as your typical BIOS setup would allow you to.
One thing that was especially of interest to me is the ability to disable the touchpad, since I don't like using it and very much prefer the Thinkpad's track point. Fortunately it is possible to disable it with Coreboot and nvramcui makes it pretty easy to change.
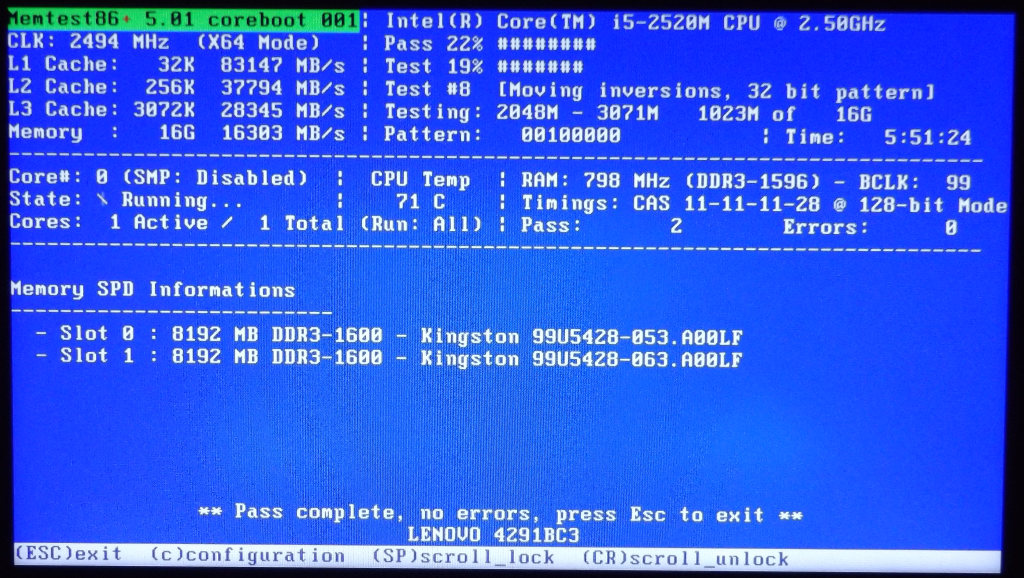
There are a couple of other payloads that are included with Coreboot and can be enabled through Coreboot's configuration at build time. Besides the already mentioned nvramcui, there is memtest86 which is quite neat to have built-in.
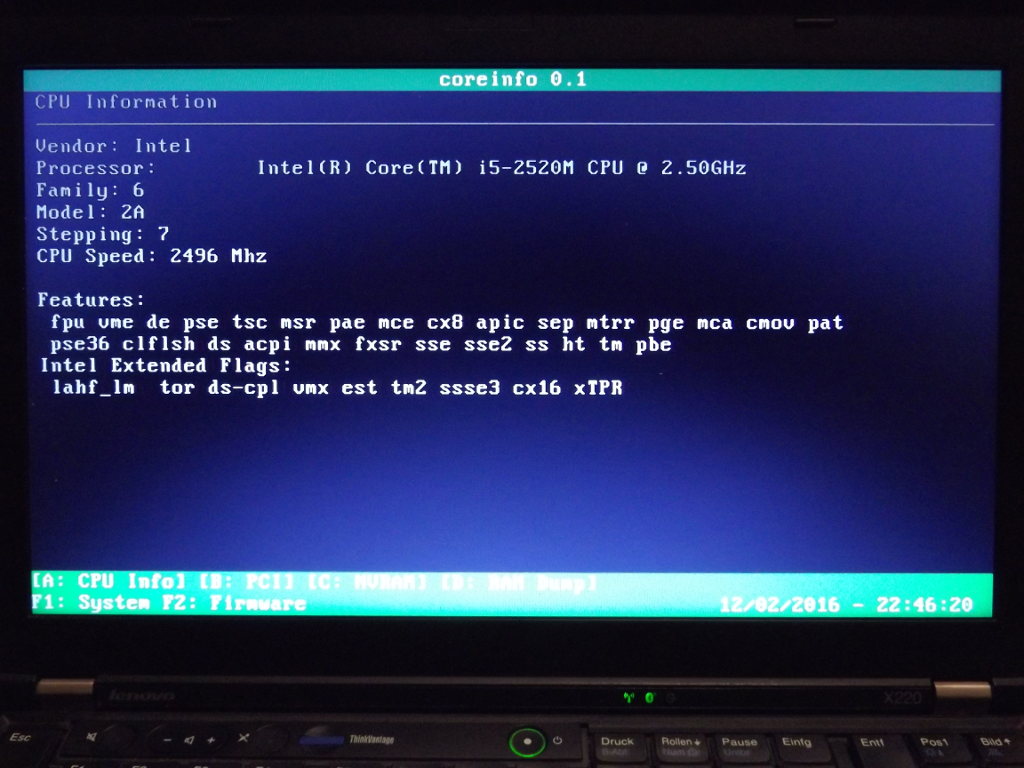
The coreinfo payload prints some information about the machine on the screen.
Then there is tint, a simple text based Tetris clone.
Privacy considerations and me_cleaner
When considering the use of Coreboot for privacy reasons on newer Intel machines, there is always this big elephant in the room, called management engine (ME). The ME consists of an additional processor that runs its own code in parallel to your operating system, with access to pretty much every system component. Nobody seems to know exactly what the ME is capable of. It certainly is capable of using the ethernet NIC, with its own MAC address.Recently a couple of people made great progress in disabling parts of Intel's management engine found in all recent Intel CPUs. As it turns out it is possible to disable large parts of the ME without the machine being forcefully shut down after 30 minutes, which was previously believed to be difficult if not impossible. The me_cleaner tool makes it very easy to clean the extracted ME image from most of the stuff.
This is supposed to work with both Coreboot and vendor firmwares. So I thought I give it a shot. Unfortunately, at least on my machine, it didn't work reliably. While the modified ME image allowed me to boot the machine and use it for more than 30 minutes, it caused all kinds of weird behavior during operation. Programs that make use of the GPU (like games) would frequently crash, which they didn't when using the unmodified ME. The Linux kernel (version 4.8.11 at the time) even deadlocked in some disk I/O operation, which prevented multiple processes from terminating properly (even kill -9 didn't work). That eventually prevented the whole machine from properly shutting down. This also has never happened before. Going back to an unmodified ME image fixed all those issues.